Online tutorials are meant to be easy to follow?
The first half of my workshop this week we watched a tutorial in how to use InDesign. I felt that watching this video I got lost very quickly, especially as i didn’t have enough time on my own computer to try and follow the video. I think that having one of my teachers going through step-by-step would’ve made this task easier. Because the video already had saved images in their computer to use and import straight away meant that very quickly I was unable to continue with trying to copy and follow given directions. As someone who is very alien to InDesign and now being half way through this video tutorial, I am incredibly lost. For me, the only thing at the moment that I need to know about InDesign is the very basics. This is where Google comes into play.
A Starters guide for:
The problem of being so alien to an application that even the online tutorial confuses you:
Firstly, my concentration span is the same of a 12 year old. Which is why am using this time wisely to research myself the most important 5 steps and first easy steps to take when you are alien to InDesign, and like me the online tutorial just confuses you. All information found is found from a very helpful site called: http://design.tutsplus.com/series/beginners-guides-to-indesign–vector-4951
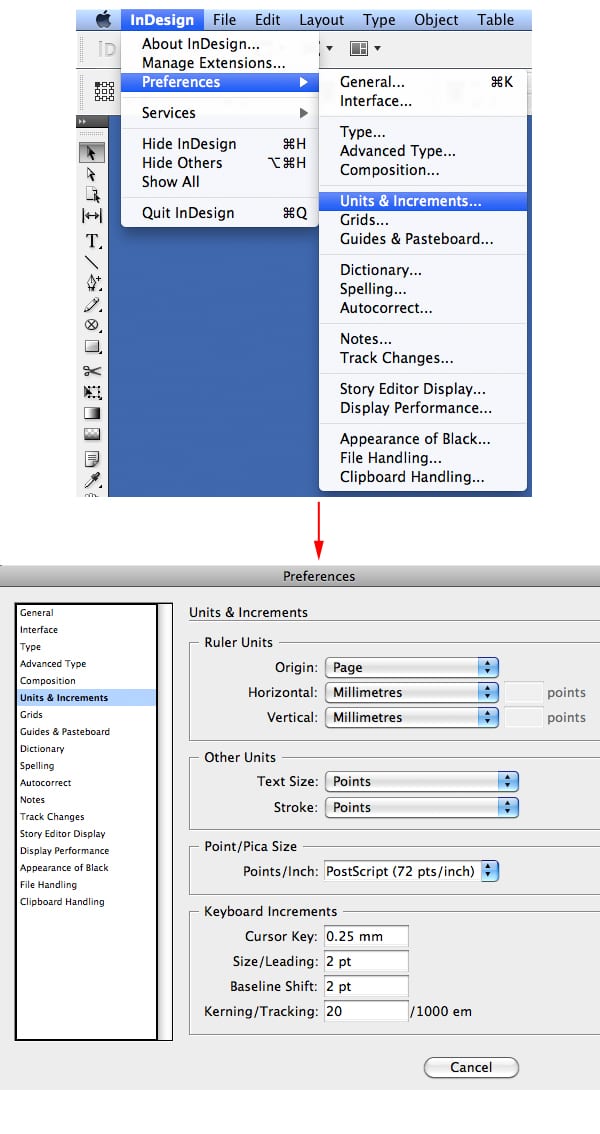
1) Rule number one of InDesign, make sure all your units of measurements are set up correctly. You able to do this by going to InDesign > Preferences > Units and increments. Under Ruler Units you are able to change the horizontal and vertical values to the desired unit of measurement. Also when creating your new document, ensure that it is a landscape or portrait piece that you are creating so that you get the right orientation for your piece of work.
2) Rule number two is to ensure that you change the presets of columns,ensure that your margins are what you want them to be. You are able to do this in the first stages of opening InDesign. By clicking on Create New > Document will bring you to a new window in where you are able to make these important changes to your document.
 It is suggested that when choosing your Bleed and Slug that the normal UK document follows measurements of 3mm for both Top, Bottom, Inside and Outside. The website I have looked at also suggests that you do not use Slug however “slug can be used to place information and notes which will be seen by a printer and then cut off along with the bleed”.
3) Make sure that now you’ve decided on all your presets that you click “Save Presets”. After clicking this you will need to name the document, once doing that your document will have its very own preset so that the next time you open InDesign this preset will be set up and ready for you to use.
4) Time to write some text! Here are the most simple steps I have found in order for you to import type using InDesign CS5.
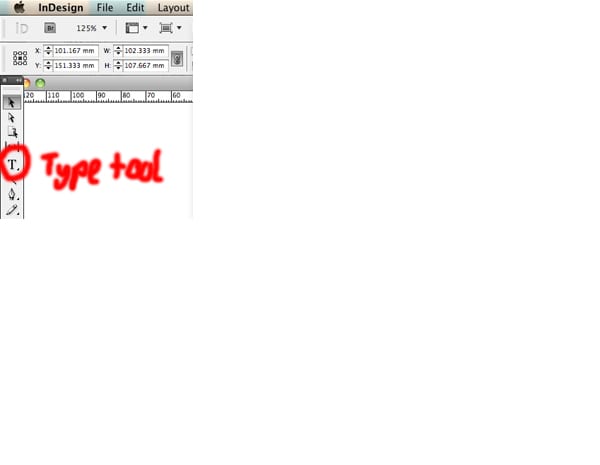
a) Direct input. Select the Type Tool, draw a text box, select your typeface, size, color etc and start typing
 b) Copy and paste. Content can be copied and pasted from a variety of sources (PDFs, text documents and the internet to name a few)
c) Importing a word processor file (Word, OpenOffice etc). A file can be added using the Place option (File > Place)
5) Lets import some images! InDesign can take a variety of graphics (jpg, eps, pdf, tiff, psd and most Adobe formats). P.S!!!! “InDesign doesn’t actually place the graphic into the document. Instead it makes a link to the original file and generates a preview within the document.”
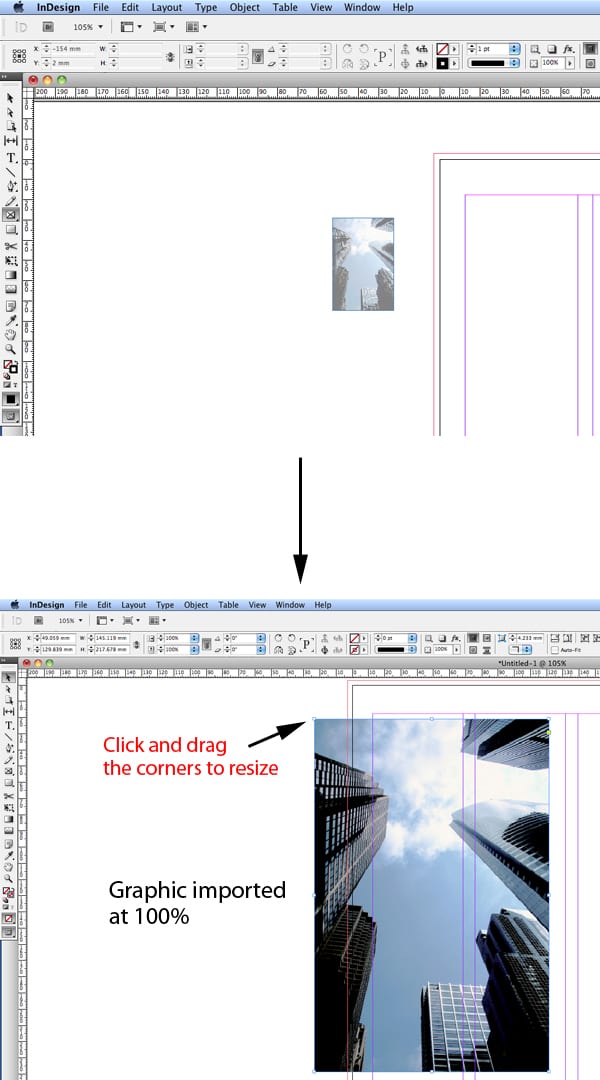
a) File > Place (Command + d) navigate to where your graphic is located, select and click open.
b) When importing graphics you can either import into an existing frame by selecting the frame with the Selection Tool (V) or you can just directly import the graphic into the document!
c) You are able to click the graphic and drag and resize to however small or large you would like. The first step is that clicking once will import your graphic at its original size (100%). If the frame is hanging over the edges of the working space use the Selection Tool to drag one of the corners to resize. Hold down shift to constrain the proportions.